Crack Measuring Tools
Digital Positon Strain Gauge Deformation Meter
The Digital Position Strain Gauge Deformation Meter shown here consists of a digital dial gauge attached to a bar. A fixed conical point is mounted at one end of the bar, and a moving conical point is mounted on a knife edge pivot at the opposite end.

A setting out bar is used to position pre-drilled discs which are attached to the structure using a suitable adhesive. Each time a reading has to be taken, the conical points of the gauge are inserted into the holes in the discs and the reading on the dial gauge noted. In this way, strain changes in the structure are converted into a change in the reading on the dial gauge.


The gauge has been designed so that only minor temperature corrections are required for changes in ambient temperature, and a reference bar is provided for this purpose.
- Measuring range : Compression - 1.6㎜ / Tension - 3.4㎜
- Minimum measuring unit :0.001㎜
- Standard accessories: Digital crack gauge, Calibration Bar, Installation Bar, Locating Discs (box of 100)
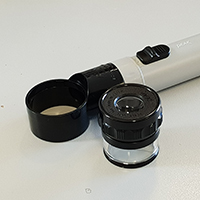
Crack Magnifier
Crack widths are normally limited to 0.2 mm or 0.3 mm in concrete structures. This inexpensive crack measuring device enables accurate determination of whether cracks exceed this limit.
- Magnification 10x
- Measuring range 20 mm x 0.1 mm
- Field of View 32mm
- Special design permitting to read on light and dark objects
- Plastic case
This loupe also comes in a self-illuminating model. Powered by two c-cell batteries this model can be used in those poorly lit areas where the natural light is dim or non-existent.
- Made of durable plastic
- Graduations from 0.1 mm to 2.5 mm
Crack Monitor
On some structures the rotation at cracks is also significant. This gauge is specifically designed to measure rotation, transverse and longitudinal movement. The crack monitor is:
- Made of polycarbonatee
- Used for measuring movements: horizontal ± 20 mm, ±10 mm.
- Reading accuracy of: ± 0.5 mm on grid.

Field Microscope
 The field microscope is a small sized lightweight and conveniently portable microscope. Designed to cover the range between high grade heavily equipped microscopes and measuring magnifiers. With a magnification of 50 times this microscope can be used to accurately measure the width of cracks and also combines a calibrated focusing ring allow the depth of cracks to also be accurately measured.
- Magnification 50x
- Measuring Range 1.6 mm x 0.02 mm
- Field of View 1.7 mm
- Comes with light


